How to Clean a Flooded Bathroom: Essential Steps for Restoration
This post may contain affiliate links or Google Ads and we may earn a small commission when you click on the links at no additional cost to you. As an Amazon Affiliate, we earn from qualifying purchases. This is at no additional cost to you and helps with our website expenses.
Figuring out how to clean a flooded bathroom can be a daunting task. But don’t worry, we’ve got you covered! This comprehensive guide will walk you through the process step by step, so you can turn a disaster into a manageable task.
Understanding the Cause of the Flood and How to Clean a Flooded Bathroom
First things first, let’s understand why your bathroom flooded in the first place. Common culprits include overflowing toilets, leaky pipes, or a malfunctioning washing machine.
Identifying the source of the flood helps you prevent it from happening again and informs your cleaning process.
Initial Response to a Flooded Bathroom

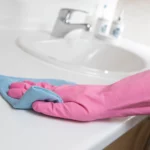
Safety comes first. Before you dive into the cleanup process, take necessary precautions. Put on rubber gloves and waterproof shoes or boots, avoid using electrical appliances, and ensure the room is well-ventilated.
Next, turn off the water source and document the damage for insurance purposes.
Step-by-Step Guide to Cleaning a Flooded Bathroom
Step 1: Removing the Water
The first step to clean a flooded bathroom is removing the water. This initial step can be quite laborious, but it’s crucial for preventing further damage. The faster you can get the water out, the better.
Start by grabbing any towels, mops, or buckets you have on hand. These common household items can be surprisingly effective in soaking up and removing water. If you have a wet/dry vacuum, that can also be a great tool for this task.
Here’s a simple list to guide you through the process:
- Use Towels: Lay towels around the water’s edge to soak up as much water as possible. Wring them out into a bucket when they’re saturated, and then lay them back down to soak up more.
- Mop Up: Use a mop to absorb any remaining shallow water. Remember to frequently wring your mop into a bucket to ensure it stays effective.
- Wet/Dry Vacuum: If you have one, a wet/dry vacuum can be a great help, especially for larger floods. Use it to suck up water quickly and efficiently.
Remember, the goal here is to remove as much standing water as possible before moving on to the next steps.
Step 2: Assessing the Damage
Once you’ve removed as much water as possible, it’s time to assess the damage. This step is crucial in determining the severity of the flood and what actions to take next.
The water may have damaged your flooring, walls, cabinets, or even seeped into adjoining rooms.
Here’s a list of things to look for when assessing the damage:
- Flooring: Check if your floor has been affected. If there are any signs of warping or discoloration, your floor might need repair or replacement.
- Walls: Inspect your walls, especially the lower sections. Look for signs of dampness, discoloration, or peeling paint.
- Cabinets and Vanities: Open all cabinets and vanities to check for water damage. Be sure to remove and dry any wet items.
- Adjoining Rooms: If the flood was severe, water may have spread to other rooms. Check adjacent rooms, especially those on lower levels, for signs of moisture or damage.
It’s important to document all damage for insurance purposes. Take clear and detailed photos of anything that’s been affected by the flood. This will help support any claims you may need to make.
Step 3: Drying Out the Bathroom
After removing the water and assessing the damage, the next step is to dry out the bathroom. This is essential to prevent mold and mildew growth, which can lead to health problems and further damage to your home.
Here’s a step-by-step guide on how to dry out your bathroom:
- Ventilate: Open all windows and doors to allow fresh air in and speed up the drying process. If it’s not possible, use fans to circulate air.
- Dehumidify: If you have a dehumidifier, now is the time to use it. A dehumidifier will help remove excess moisture from the air and speed up the drying process.
- Dry Surfaces: Wipe down all surfaces with dry towels to remove any remaining moisture. This includes floors, walls, and cabinets.
- Remove Wet Items: Remove any wet items from the bathroom. This can include rugs, shower curtains, and even toiletries that got wet. Allow these items to dry completely before returning them to the bathroom.
Remember, drying out the bathroom may take some time, but it’s an important step in preventing long-term damage. Be patient and ensure everything is completely dry before moving on to cleaning and disinfecting.
Step 4: Cleaning and Disinfecting
After you’ve dried out your bathroom, it’s time to clean and disinfect. This is a critical step to ensure all harmful bacteria and potential mold spores are eliminated.
Floodwater can often carry contaminants that pose health risks, so thorough cleaning and disinfection are crucial.
Here’s a detailed guide on how to clean and disinfect your bathroom:
- Prepare Your Cleaning Solutions: You can use commercial cleaning products or make natural ones at home. For a homemade solution, mix one cup of bleach with one gallon of water. Always wear gloves and ensure the room is well-ventilated when using cleaning solutions.
- Scrub Surfaces: Use a scrub brush or sponge and your cleaning solution to thoroughly clean all surfaces. This includes the floor, walls, sink, toilet, bathtub, and shower. Don’t forget about cabinets, shelves, and countertops.
- Clean Grout and Seals: Pay special attention to grout and seals, as these areas can harbor mold and mildew. Use a toothbrush for detailed cleaning.
- Rinse and Dry: After scrubbing, rinse all surfaces with clean water. Once everything is rinsed, dry all surfaces thoroughly with towels or let them air dry.
- Disinfect: After everything is clean and dry, apply a disinfectant to all surfaces. This will kill any remaining bacteria or mold spores. You can use a commercial disinfectant or a solution of 2 tablespoons of bleach in a gallon of water.
- Clean Soft Surfaces: Don’t forget about shower curtains, rugs, and bath mats. These should be machine washed on a hot cycle if possible. If not, scrub them with your cleaning solution, rinse, and then allow them to dry completely.
Remember, cleaning and disinfecting after a flood are not tasks to rush. Take your time to ensure every area of your bathroom is thoroughly cleaned and disinfected. This will help prevent future problems like mold growth and lingering odors.
Step 5: Checking and Fixing Plumbing Issues
The final step in cleaning a flooded bathroom is to address any underlying plumbing issues that may have caused the flood. Ignoring these issues could lead to more floods in the future, costing you time, money, and stress.
Here’s a detailed guide on how to check for and fix common plumbing issues:
- Inspect Toilets: A common cause of bathroom floods is an overflowing or leaking toilet. Check for leaks around the base of the toilet, and make sure it flushes properly. If you notice any issues, you may need to replace the wax ring or repair the internal components.
- Check Faucets and Showerheads: Look for drips or leaks from your faucets and showerheads when they’re turned off. If you find any, you may need to replace the washer or cartridge inside the fixture.
- Look at Pipes: Inspect visible pipes for any signs of leaks or damage. This includes pipes under the sink and behind the toilet. If you see any wet spots or rust, you may have a leak.
- Assess Drains: Slow or clogged drains can also contribute to flooding. Test all drains in your bathroom to ensure they’re draining quickly and efficiently. If they’re not, you may need to clear a clog.
- Call a Professional: If you’re unsure about any of these steps, or if you’ve identified an issue but aren’t comfortable fixing it yourself, it’s time to call a professional plumber. They have the skills and tools to diagnose and fix any plumbing problems safely and effectively.
Addressing plumbing issues is crucial to prevent future floods. It’s always better to fix a small problem now than to deal with a major flood later. So don’t skip this important step in the cleanup process!
Product Recommendations
Cleaning a flooded bathroom requires some specific products. Here are our top picks for commercial and natural solutions:
Commercial Cleaning Products
Cleaning a flooded bathroom requires powerful and effective cleaning products. Here are some commercial cleaning products available on Amazon that can help you with the task:
ZymeAway Flood Water Stain Cleaner: This cleaner is specifically designed to handle the aftermath of flooding, including debris, mold, and mildew stains.
| Preview | Product | Rating | Price | |
|---|---|---|---|---|

|
ZymeAway Organic Enzyme Cleaner | $25.20 | Buy on Amazon |
Fiberlock ShockWave RTU Disinfectant Cleaner: Ideal for water restoration and flood mitigation, this hospital-grade disinfectant is ready-to-use and can effectively clean a variety of surfaces.
| Preview | Product | Rating | Price | |
|---|---|---|---|---|

|
Fiberlock ShockWave RTU Disinfectant Cleaner, 1 Gallon, Ideal for Water Restoration & Flood… | $33.99 | Buy on Amazon |
Scrubbing Bubbles Fresh Gel Toilet Bowl Cleaning Stamps: These stamps provide continuous toilet bowl cleaning, working well on limescale and toilet rings.
| Preview | Product | Rating | Price | |
|---|---|---|---|---|

|
Scrubbing Bubbles Toilet Gel Stamps, Fresh Gel Toilet Cleaning Stamps, Helps Keep Toilet Clean and… |
$13.87 |
Buy on Amazon |
Clorox ToiletWand Disposable Toilet Cleaning System: Designed for easy and deep cleaning of toilets, this system can also be used in other areas of your bathroom.
| Preview | Product | Rating | Price | |
|---|---|---|---|---|

|
Clorox ToiletWand Toilet Cleaning Kit, ToiletWand, Caddy and 6 Refills, Pack of 6 (Pack May Vary) |
$10.79 |
Buy on Amazon |
Professional Lysol Disinfectant Spray: An EPA-registered disinfectant, it kills 99.9% of fungi, viruses, and bacteria on commonly touched hard and soft surfaces.
| Preview | Product | Rating | Price | |
|---|---|---|---|---|

|
Lysol Fabric Disinfectant Spray, Sanitizing and Antibacterial Spray, For Disinfecting and… | Buy on Amazon |
Remember to always follow the manufacturer’s instructions when using these products for optimal safety and effectiveness.
Natural Cleaning Solutions
Cleaning a flooded bathroom can be a daunting task, but with the right natural cleaning products, it can be made easier.
Here are some natural cleaning products available on Amazon that can help you tackle this task:
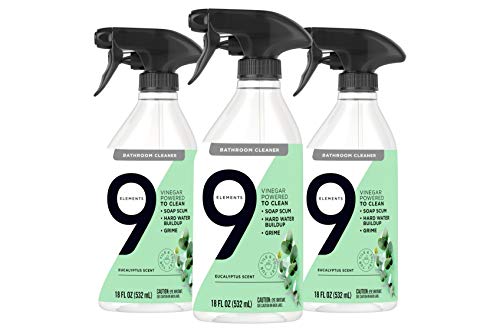
9 Elements Bathroom Cleaner: This cleaner is made with vinegar and comes in Lemon and Eucalyptus scents. It’s great for cleaning showers, tubs, and tiles.
| Preview | Product | Rating | Price | |
|---|---|---|---|---|
|
9 Elements Bathroom Cleaner, Eucalyptus Multi Surface Shower, Tub, & Tile Cleaning Vinegar Spray, 18… | Buy on Amazon |
ECOS Bathroom Cleaner: This all-purpose cleaning spray is ideal for showers, tiles, and bathtubs. It’s plant-powered and doesn’t require scrubbing or rinsing.
| Preview | Product | Rating | Price | |
|---|---|---|---|---|

|
ECOS Bathroom Cleaner – Shower, Tile & Bathtub – All Purpose Cleaning Spray & Shower Cleaner – No… | $17.60 | Buy on Amazon |
ZymeAway Enzyme Virus, Mold, Mildew, Algae Stain and Flood Cleaner: This super concentrate is safe for people, pets, and the environment.
| Preview | Product | Rating | Price | |
|---|---|---|---|---|

|
ZymeAway Organic Enzyme Cleaner | $50.40 | Buy on Amazon |
Gonzo Disinfectant Spray & Multipurpose Cleaner: With a refreshing citrus scent, this product eliminates odors and disinfects surfaces from flood, fire, and water damage.
| Preview | Product | Rating | Price | |
|---|---|---|---|---|

|
Gonzo Disinfectant Spray & Multipurpose Cleaner – Citrus Value Pack 24 oz. and 128 oz. Refill – Odor… | Buy on Amazon |
Earth Friendly Products Proline Parsley Plus All-Purpose Kitchen-Bathroom Cleaner-Degreaser: This natural cleaner-degreaser works well in kitchens and bathrooms, making it an excellent choice for cleaning after a flood.
| Preview | Product | Rating | Price | |
|---|---|---|---|---|

|
Earth Friendly Products Proline PL9746/04 Parsley Plus All-Purpose Kitchen-Bathroom… |
$54.89 |
Buy on Amazon |
Remember to always follow the manufacturer’s instructions when using these products for optimal safety and effectiveness.
Preventing Future Bathroom Floods
Preventing future bathroom floods is an important aspect of maintaining your home. Here are some steps you can take to mitigate the risk:
1. Regular Maintenance: Keep up with regular maintenance tasks such as checking for leaks, ensuring your pipes are in good condition, and clearing out drains. This helps to identify potential problems before they become serious.
2. Install Overflow Drains: Consider installing an overflow drain in your bathtub or sink. This can prevent water from overflowing if you accidentally leave the tap on or if a clog prevents water from draining.
3. Use Hair Traps: Hair traps can prevent hair and other debris from clogging your drains. Remember to clean them out regularly.
4. Be Mindful of What You Flush: Only flush toilet paper down the toilet. Other items, even those labeled as ‘flushable,’ can clog your pipes and lead to flooding.
5. Install a Water Leak Detector: These devices can detect leaks and automatically shut off your water supply, preventing a small leak from becoming a large flood.
6. Get Regular Plumbing Inspections: Have a professional plumber inspect your plumbing system regularly. They can identify and fix potential issues before they lead to a flood.
Remember, while you can’t completely eliminate the risk of a bathroom flood, these steps can significantly reduce it. Regular maintenance and prompt attention to potential issues are key to keeping your bathroom dry and flood-free.
Conclusion to How to Clean a Flooded Bathroom
Cleaning a flooded bathroom may seem overwhelming, but with the right approach and tools, you can handle it like a pro. Remember to stay safe, clean thoroughly, and seek professional help when needed.